In the rapidly evolving world of technology, 3D printing is making remarkable strides, pushing the boundaries of what we can create and achieve. Among those, a new path has been carved for sports enthusiasts, paving the way for 3D printed pickleball paddles. Whether you are a player seeking to customize your own equipment, or a curious mind intrigued by the prospect of combining tech and sport, this essay aims to equip you with the necessary knowledge to venture into the realm of 3D printed pickleball paddles. Starting from the very fundamentals of 3D printing, the essay intends to guide you on how to model and design your pickleball paddle, print it, post-process it, and lastly, achieve a surface finish optimal for gameplay.
Understanding 3D Printing Basics
Understanding 3D Printing Basics
3D printing, also referred to as additive manufacturing, is a process that creates a physical object from a digital design. The process involves layering material to form a three-dimensional object. The first step in 3D printing a pickleball paddle, is understanding the different types of 3D printers. There are several types of 3D printers, but the most common for at-home use is the Fused Deposition Modeling (FDM) printer. This printer works by heating a thermoplastic filament and precisely ejecting the melted material layer by layer to create the object.
Materials Used for 3D Printing
Various materials can be used in 3D printing, depending on the type of printer and the purpose of the object. For FDM printers, materials like PLA (Polylactic Acid) or ABS (Acrylonitrile Butadiene Styrene) are commonly used, due to their ease of use and durability. PLA, a biodegradable material derived from renewable resources such as corn starch or sugar cane, is highly recommended for beginners due to its lower printing temperature and less warping compared to ABS. ABS, on the other hand, is a strong and heat-resistant material, making it perfect for more durable applications. For a pickleball paddle, filament materials like PLA or PETG would be suitable considering their durability and flexibility.
Technical Aspects of 3D Printing
Understanding the technical aspects of 3D printing is essential to achieve a successful print. Print resolution, print speed, and layer height play crucial roles in the outcome of your 3D print.
Print resolution may be described as the level of detail achievable by the printer. It is measured in microns – the smaller the number, the higher the resolution. High resolution means a more detailed print, but it also means longer print times.
Print speed is the rate at which the printer can move its extruder – in other words, how fast it can print. Print speed needs careful consideration because faster printing may result in lower quality prints.
Layer height is tied closely to print resolution – it’s the thickness of an individual layer of the printed material. A lower layer height creates a smoother finish, but like resolution, it also means a longer print time.
3D Modeling and Design
Understanding Pickleball Paddle Design
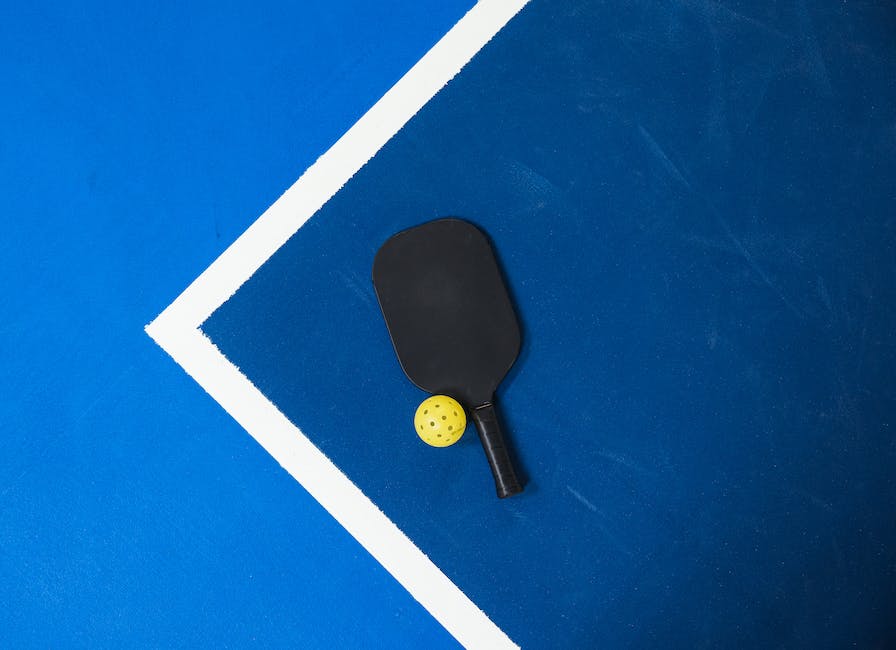
To design a pickleball paddle suitable for 3D printing, one must understand the standard dimensions and placement of key features. Tournament-approved pickleball paddles typically range from 7.3 to 8.5 inches in width and 15.5 to 16 inches in length, with a perimeter grip size of around 4.25 inches. However, these dimensions might slightly vary based on a player’s preferences.
Choosing a 3D Modeling Software
Selecting a 3D modeling software that suits your technical ability and design aspiration is critical. Beginners may opt for Tinkercad, a browser-based 3D modeling software that utilizes blocks, shapes, and text for model creation. More advanced users could consider Blender or Fusion 360, which offer more intricate tools and allow for higher levels of detail in your design.
Creating a Pickleball Paddle Design
To create a 3d model of a pickleball paddle, open your chosen 3D modeling software and select a plane to start. Sketch a rectangle on this plane, matching the dimensions you’ve decided for your paddle. Either round the edges or keep them square, depending on your aesthetic preference. This is the base of your paddle.
For the handle, create a solid cylinder and position it at the base of the paddle. Use the appropriate tool to merge this cylinder with your paddle base. If there’s interest in adding texture to the grip, consider using the pattern or emboss features available in most software.
Next, sketch a small rectangle on the face of the paddle that is representative of the hitting zone.
Adding Perforations
Pickleball paddles contain small holes or perforations to allow the ball to rebound off the paddle with force. For adding these perforations, make a series of small, round cuts in the area defined as the hitting zone. Ensure you maintain a balanced distribution and avoid weakening the structure of the paddle.
Optimizing the Design for 3D Printing
Once your design is complete, the next step is to optimize it for 3D printing. This involves making sure the model is ‘watertight’, meaning there are no holes or spaces in the model that would prevent it from printing correctly. Check this by viewing your model in a mesh form.
All major 3D software provides tools to repair holes, intersecting faces, and other common issues that can occur with 3D models. Use these tools to correct any issue and ensure that your model is printer-friendly.
Save your design in a format compatible with your 3D printer, usually .STL or .OBJ. Check the specifications of your specific printer model to confirm compatibility.
Final Considerations
Remember, 3D printed pickleball paddles may not meet official pickleball standards for competitive play, but they’re great for recreational use or practice. Other key considerations include the plastic type used in printing, strength, infill density, layer height and print speed, which can affect the final product quality and performance.
Printing and Post-Processing
Understanding 3D Printing Basics
The process of 3D printing a pickleball paddle begins with understanding your 3D printer. Your printer’s user guide is an essential place to start, but generally, you’ll need to ensure that your device is adequately calibrated and that your printing bed is leveled. Your filament should also be clean and free from defects. Determine the type of filament your printer requires, as filament types can vary from PLA, ABS, to more advanced materials like nylon or PETG.
Choosing the Correct Print Settings
Different 3D printer models will have different setting options, but common parameters you’ll need to consider include layer height, print speed, wall thickness, and infill. For a pickleball paddle, a bigger layer height (0.2mm – 0.3mm) could be acceptable, as high resolution is not critically needed. Print speed will generally range from 50mm/s to 100mm/s. It’s best to start on the slower side and adjust as needed. Wall thickness and infill are determinant of the strength and weight of the paddle. A higher infill and thicker walls will make a stronger and heavier paddle but will also increase printing time and material usage.
Starting a 3D Print Job
Firstly, load your pickleball paddle 3D model into slicing software such as Cura or Simplify3D. After trimming your model and adjusting the print settings, export the G-code file to your printer. Ensure your 3D printer is properly preheated to the right temperature for the filament type. Load the G-code on your printer’s software or SD card, then start the print job.
Handling Common Printing Issues
3D printing issues can range from warping, stringing, to nozzle clogging. To avoid warping, ensure your printing bed is evenly heated and consider using a better bed adhesion method like brims or rafts. Stringing is often caused by improper retraction settings. Adjusting retraction distance and speed can help to reduce this problem. Nozzle clogging, on the other hand, can often be fixed by cleaning the nozzle with a pin or even disassembling the hot end for a thorough clean.
Post-printing: Removing Support Structures
Some 3D printed models will require support structures, especially those with overhangs more significant than 45 degrees or models with bridges. These are designed to be easy to remove. Use a pair of pliers or a craft knife to carefully remove these supports from your printed paddle. Be cautious not to damage your paddle in the process.
Post-printing: Smoothing Surfaces
Post-printing, you might find that your pickleball paddle’s surface is not as smooth as you’d like. You can smoothen your 3D printed paddle by sanding, polishing, or using filler primers. Be aware, though, that these techniques can be time-consuming and might require extra materials like sandpaper or filler primer. Another option for ABS printed paddles is acetone smoothing, a method where acetone vapor is used to smooth ABS prints. However, this method is dangerous if mishandled and might change the dimensions of the paddle. Therefore, it’s crucial to follow safety guidelines when performing acetone smoothing.
Paddle Surface Finishing Techniques
Understanding the Importance of Paddle Surface Finish
In pickleball, the surface finish of the paddle is a crucial factor affecting performance. A well-finished surface can enhance ball control, spin and overall maneuverability, thereby improving the player’s game. However, 3D-printed pickleball paddles need particular attention when it comes to surface finishing to acquire the necessary smoothness and adhere to the U.S.A. Pickleball Association’s equipment guidelines.
Techniques for Achieving a Smooth Finish
There are several techniques available to smooth a 3D-printed pickleball paddle.
The first is sanding. Begin by using a coarse-grit sandpaper to remove prominent layer lines and irregularities on the paddle, be careful not to apply too much pressure to avoid any potential distortion. Gradually move towards medium to fine-grit sandpapers for a smoother finish. Note that manual sanding will require time and patience to achieve optimal results.
The second method is using acetone vapor. Acetone vapor can be used for ABS plastic-based paddles to achieve a glossy finish. However, caution needs to be exercised while using acetone due to its flammable nature. The paddle is hung in a container with some acetone at the bottom, and the container is sealed. The acetone will evaporate and react with ABS plastic, creating a smooth surface.
Lastly, epoxy coating can also provide a professional look. Epoxy is a two-part adhesive that, when mixed, hardens into a durable surface. Due to its filling properties, it’s excellent for masking the layer lines of 3D printed parts. Ensure to apply a thin, even layer and allow for adequate curing time.
Understanding Different Finishing Materials
Choosing the right material for your paddle’s finish is pivotal. ABS plastic is a popular choice for 3D-printed pickleball paddles due to its easy machinability and excellent mechanical properties. However, ABS’s relatively rough texture might need further finishing processes.
Alternatively, PLA is easier to work with and provides solid strength, but might lack the durability and heat resistance of ABS.
Another reliable option is PETG, which offers a blend of the strengths of both ABS and PLA – it’s easy to print while providing excellent durability.
Applying the Finish and Performance Implications
Applying a finish involves several steps. First, remove any apparent imperfections before proceeding to finer grits for complete smoothing. Apply a primer to enhance the material’s adhesion to sealants or paints used later. Then, apply your chosen finishing material evenly.
Pickleball paddles’ surface finish directly impacts their performance in games. A well-finished paddle ensures better ball control, allowing players to direct the ball with greater precision. The right level of smoothness can also improve the paddle’s aerodynamics, making swings faster and more efficient.
Moreover, certain finishes can influence the spin – a critical aspect of pickleball gameplay. Glossy finishes usually reduce spin since the ball tends to slide off, whereas matte or textured finishes can increase the spin as they grip the ball better.
To conclude, attaining a perfectly finished 3D-printed pickleball paddle involves careful understanding of the different materials and a detailed, methodical application process. It holds the potential to drastically improve gameplay by influencing ball control, spin, and swing speed.
Through understanding the nuances of 3D printing and its application in designing pickleball paddles, the reader is expected to not only learn how to produce a personalized paddle but also grasp the intricacies of the broader 3D printing sphere. By embodying a hands-on approach and engaging with this magnificent confluence of technology and sports, one truly has the chance to appreciate the richness and potential of 3D printing. The process of designing, creating, and refining a pickleball paddle fosters a deeper sense of connection with the game and enriches the overall experience. After all, there’s no greater joy than playing a match with a paddle you brought to life yourself.

I am Michael Wanner, an experienced and educated expert in the field of pickleball. I hold a degree in Sports Science from Cleveland State University, Ohio, USA. My expertise lies in the technical aspects of pickleball and how to play it effectively. I have spent many years playing and coaching pickleball and have a wealth of knowledge to share with my readers. I am a valuable resource for anyone looking to improve their pickleball skills and strategies.
